Jul 30, 2024
How To Use Airtable To Automate Authentic Digital Certificate Creation
In this guide, you will learn how to use Airtable to automate digital certification process from our previous tutorial.

Shulhi Sapli
Founder

In this guide, you will learn how to use Airtable to automate digital certification process from our previous tutorial.
This is a follow up guide for How to create authentic digital certificate for your online course.
In this guide, you will learn how to use Airtable to automate the process you learn from the previous guide.
If you're not familiar with Airtable, you should definitely check them out and it is a very capable tool that everyone especially marketers should have in their tool belt.
In order to generate the signed URL, you need a convenient place to serve the script and to call it through a simple trigger. AWS Lambda function fits the bill.
secure_signed_image.PYTHONimport json import hmac import hashlib import base64 def base64_encode(string): """ Removes any `=` used as padding from the encoded string. """ encoded = base64.b64encode(string.encode()) encoded = encoded.rstrip(b'=') return encoded def generate_url(candidate): user_id = "" secret_key = "" base_id = "" modifications = [ { "name": "text_candidate", "text": candidate } ] # ensure no spaces in json output encoded = json.dumps(modifications, separators=(',', ':')) encoded = base64_encode(encoded).decode() parameters = "{user_id}+{base_id}+{modifications}".format(user_id=user_id, base_id=base_id, modifications=encoded) signature = hmac.new(secret_key.encode(), parameters.encode(), hashlib.sha256).hexdigest() url = "https://images.usestencil.com/signed-images/{user_id}/{base_id}.png?modifications={modifications}&s={signature}".format( base_id=base_id, user_id=user_id, modifications=encoded, signature=signature ) return url def lambda_handler(event, context): # we read the name from the query string # i.e. https://xxx.amazonaws.com/default/secure_signed_image?name=David candidate = event["queryStringParameters"]["name"] url = generate_url(candidate) resp = { "url": url } return { 'statusCode': 200, 'body': json.dumps(resp) }
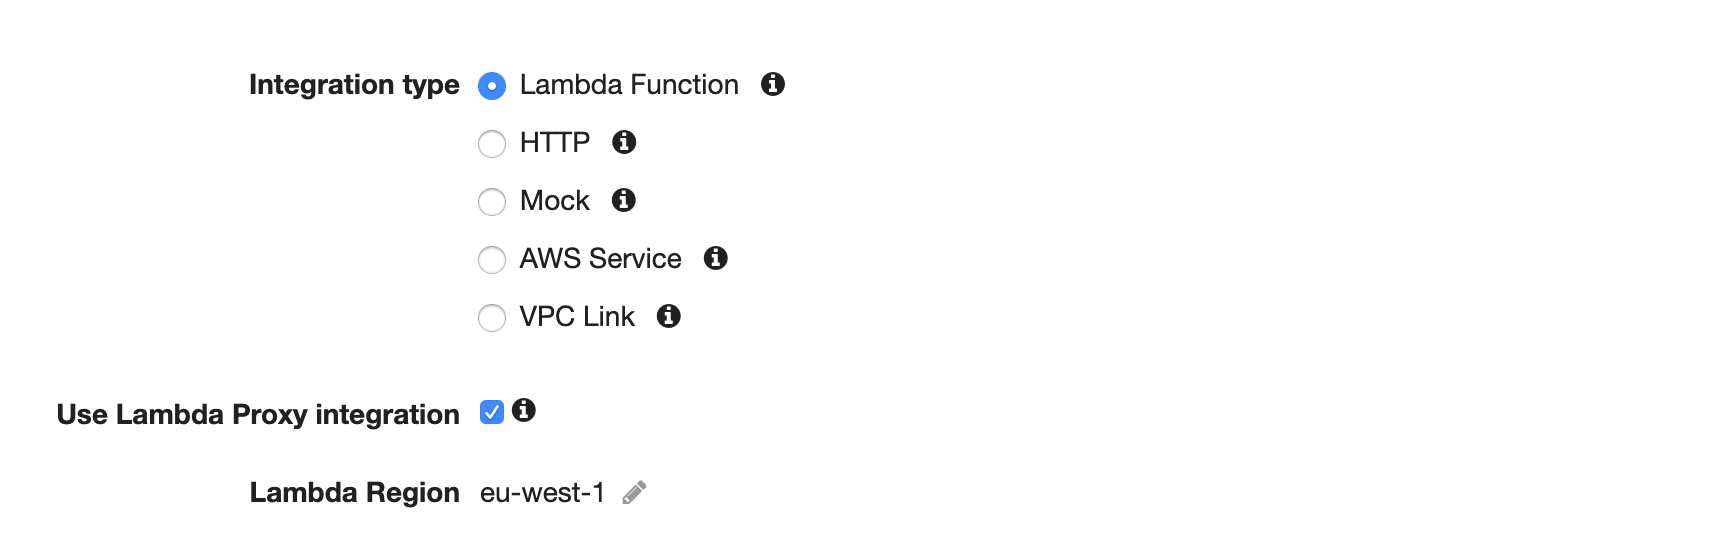
We need to set up HTTP trigger so we can call the URL publicly and execute our lambda function. One additional step we need to take care of is to ensure our trigger is proxied to our lambda so we can capture the query string properly.
The following video shows the setup one-by-one.
We will get our candidates' name from table in Airtable. Airtable needs to be set in certain ways to allow for Integromat integration. We will also use Integromat to help tie everything together.

Generated signed URL will be populated into Signed URL column
For this example, we create 3 columns in which 2 columns are text and the last column (Last Modified) is a special Airtable column that tracks the last modified time.
For this particular column, we only set the last modified time when the Name column is updated.
See the video for the process
Now that we have launched our function to AWS Lambda and Airtable is ready for integration, we can call the lambda function any time to get back the signed URL.

The workflow basically works like this,
You can work on similar integration with Google Sheet.