Feb 6, 2026
How To Automate Race Bibs Making
Discover how to streamline race bib creation with automation, ensuring a seamless and efficient process for your next event.

Sharleena AM
Technical Writer

Discover how to streamline race bib creation with automation, ensuring a seamless and efficient process for your next event.
Organizing a race event involves numerous logistical details, from securing the venue to coordinating with various sponsors. While those logistics are crucial, race bibs are an essential component that provides participants with a unique identifier, often doubling as a key memento of the event.
Creating race bibs that are both functional and visually appealing doesn’t need to be a labor-intensive process. By taking advantage of templates and automation, you can efficiently design and produce a consistent set of race bibs for all participants, saving valuable time to focus on other critical aspects of your event.
With tools like Stencil, making and distributing race bibs becomes a streamlined process. In this guide, we’ll explore three different methods for generating customized bibs with minimal effort—from utilizing a free design tool to implementing an end-to-end automated workflow.
Planning a race can be both an exciting and overwhelming experience, especially when it comes to managing logistics such as designing participant bibs. Instead of manually crafting and personalizing each bib, you can automate the process using templates and tools. This guide will show you how to create personalized race bibs for all your participants with ease.
There are solutions that handle everything from bib design, printing and race result tracking. However, depending on your event it might be costly. For example, a race event for school or charity event might not opt for this option as it can cost a lot. For this scenario, a DIY approach might work better and Stencil can definitely helps in this case.
Begin by selecting your race bib design. You can:
The primary function of a race bib is to serve as an identifier for participants, incorporating crucial elements like:
To manage your participants efficiently, keep your list structured to facilitate the race bib creation process. Automating your race bib production can save significant time and ensure consistency across all outputs.
For instance, the QR code on your bib could lead to a personalized page on your event website. Free services such as Google Forms, integrated with Google Sheets, or Airtable working with Airtable Forms, can help manage this information.
Consider including these columns in your participants list:
Example:
| Name | Bib Number | Team Name |
|---|---|---|
| Alice | 101 | Fast Track |
| Bob | 102 | Speedsters |
When it comes to automation, several tools can simplify the race bib creation process:
Let’s build our race bib automation system quickly—a process designed to take less than 15 minutes!
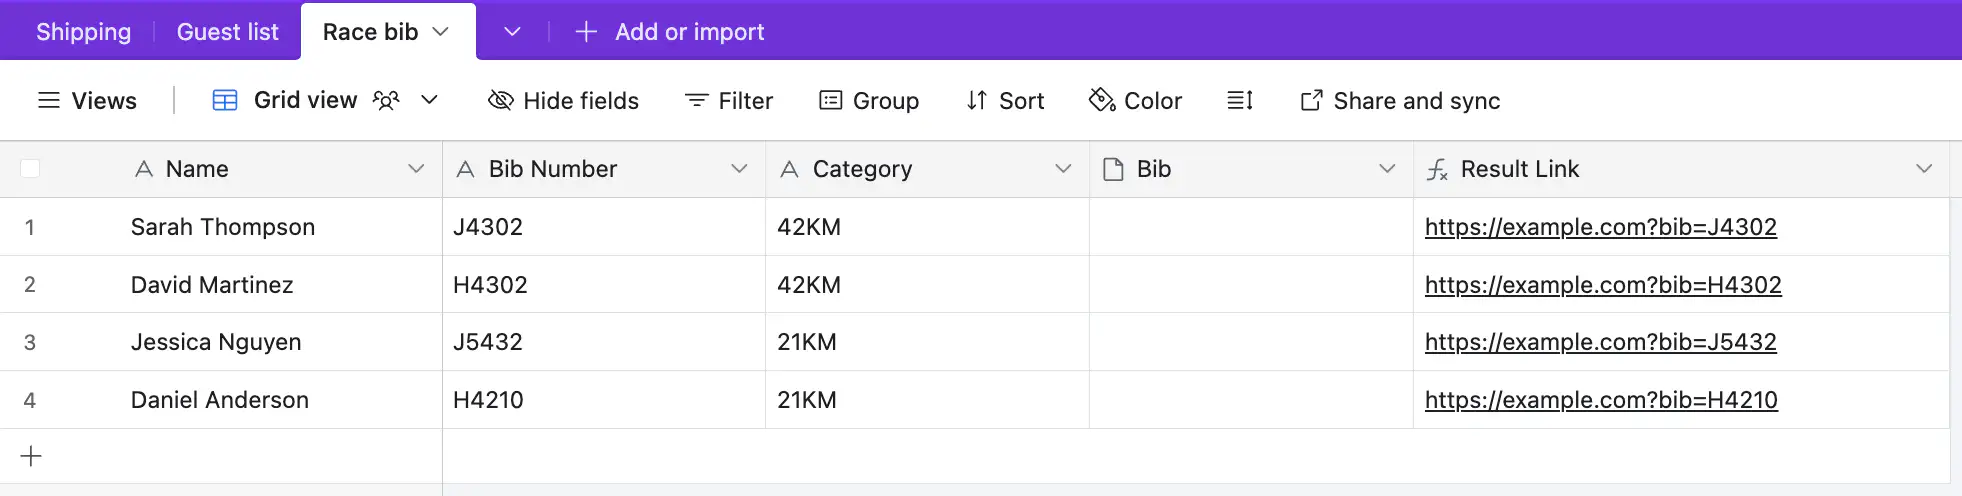
Start by setting up your participants list in Airtable, which will also host your registration form.
Structure your table with these columns:
The
Bibcolumn is critical and should be of theAttachmenttype to store generated race bibs.
The Link column can be used to generate the invidual link for the race result. We can display the link as a QR code in the bib for users to scan.
In this tutorial, we set the formula as "https://example.com?bib=" & ENCODE_URL_COMPONENT({Bib Number}).
Next, we'll create a template with Stencil that will be used for automating race bib generation.
You can either design a template using Stencil from scratch or import an image from tools like Canva if desirable. Register for a free Stencil account if you haven’t done so, then create a new project and template.
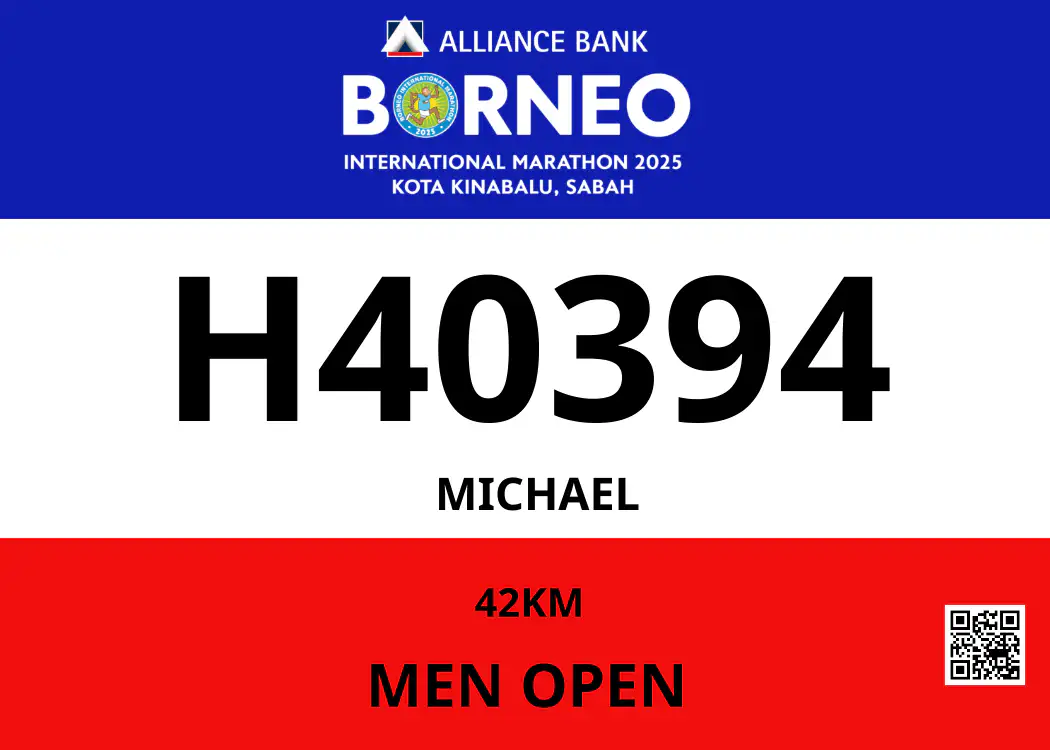
Here’s an example that includes elements necessary for race bibs:
When creating the template, ensure that layers are named appropriately. For example, the number layer will receive data from the Bib Number column in Airtable, and the qr layer will link to the participant’s custom race page.
Next, we will setup Airtable integration for Stencil. This allows Stencil to pull in the data from your Airtable and create the bibs for each row in your Airtable table.
With your participant list prepared, it's time to generate the race bibs. Set up Airtable integration in Stencil.
You'll need the following information from Airtable:
Configure your Airtable integration within Stencil.

Ensure that your connection is functioning correctly!
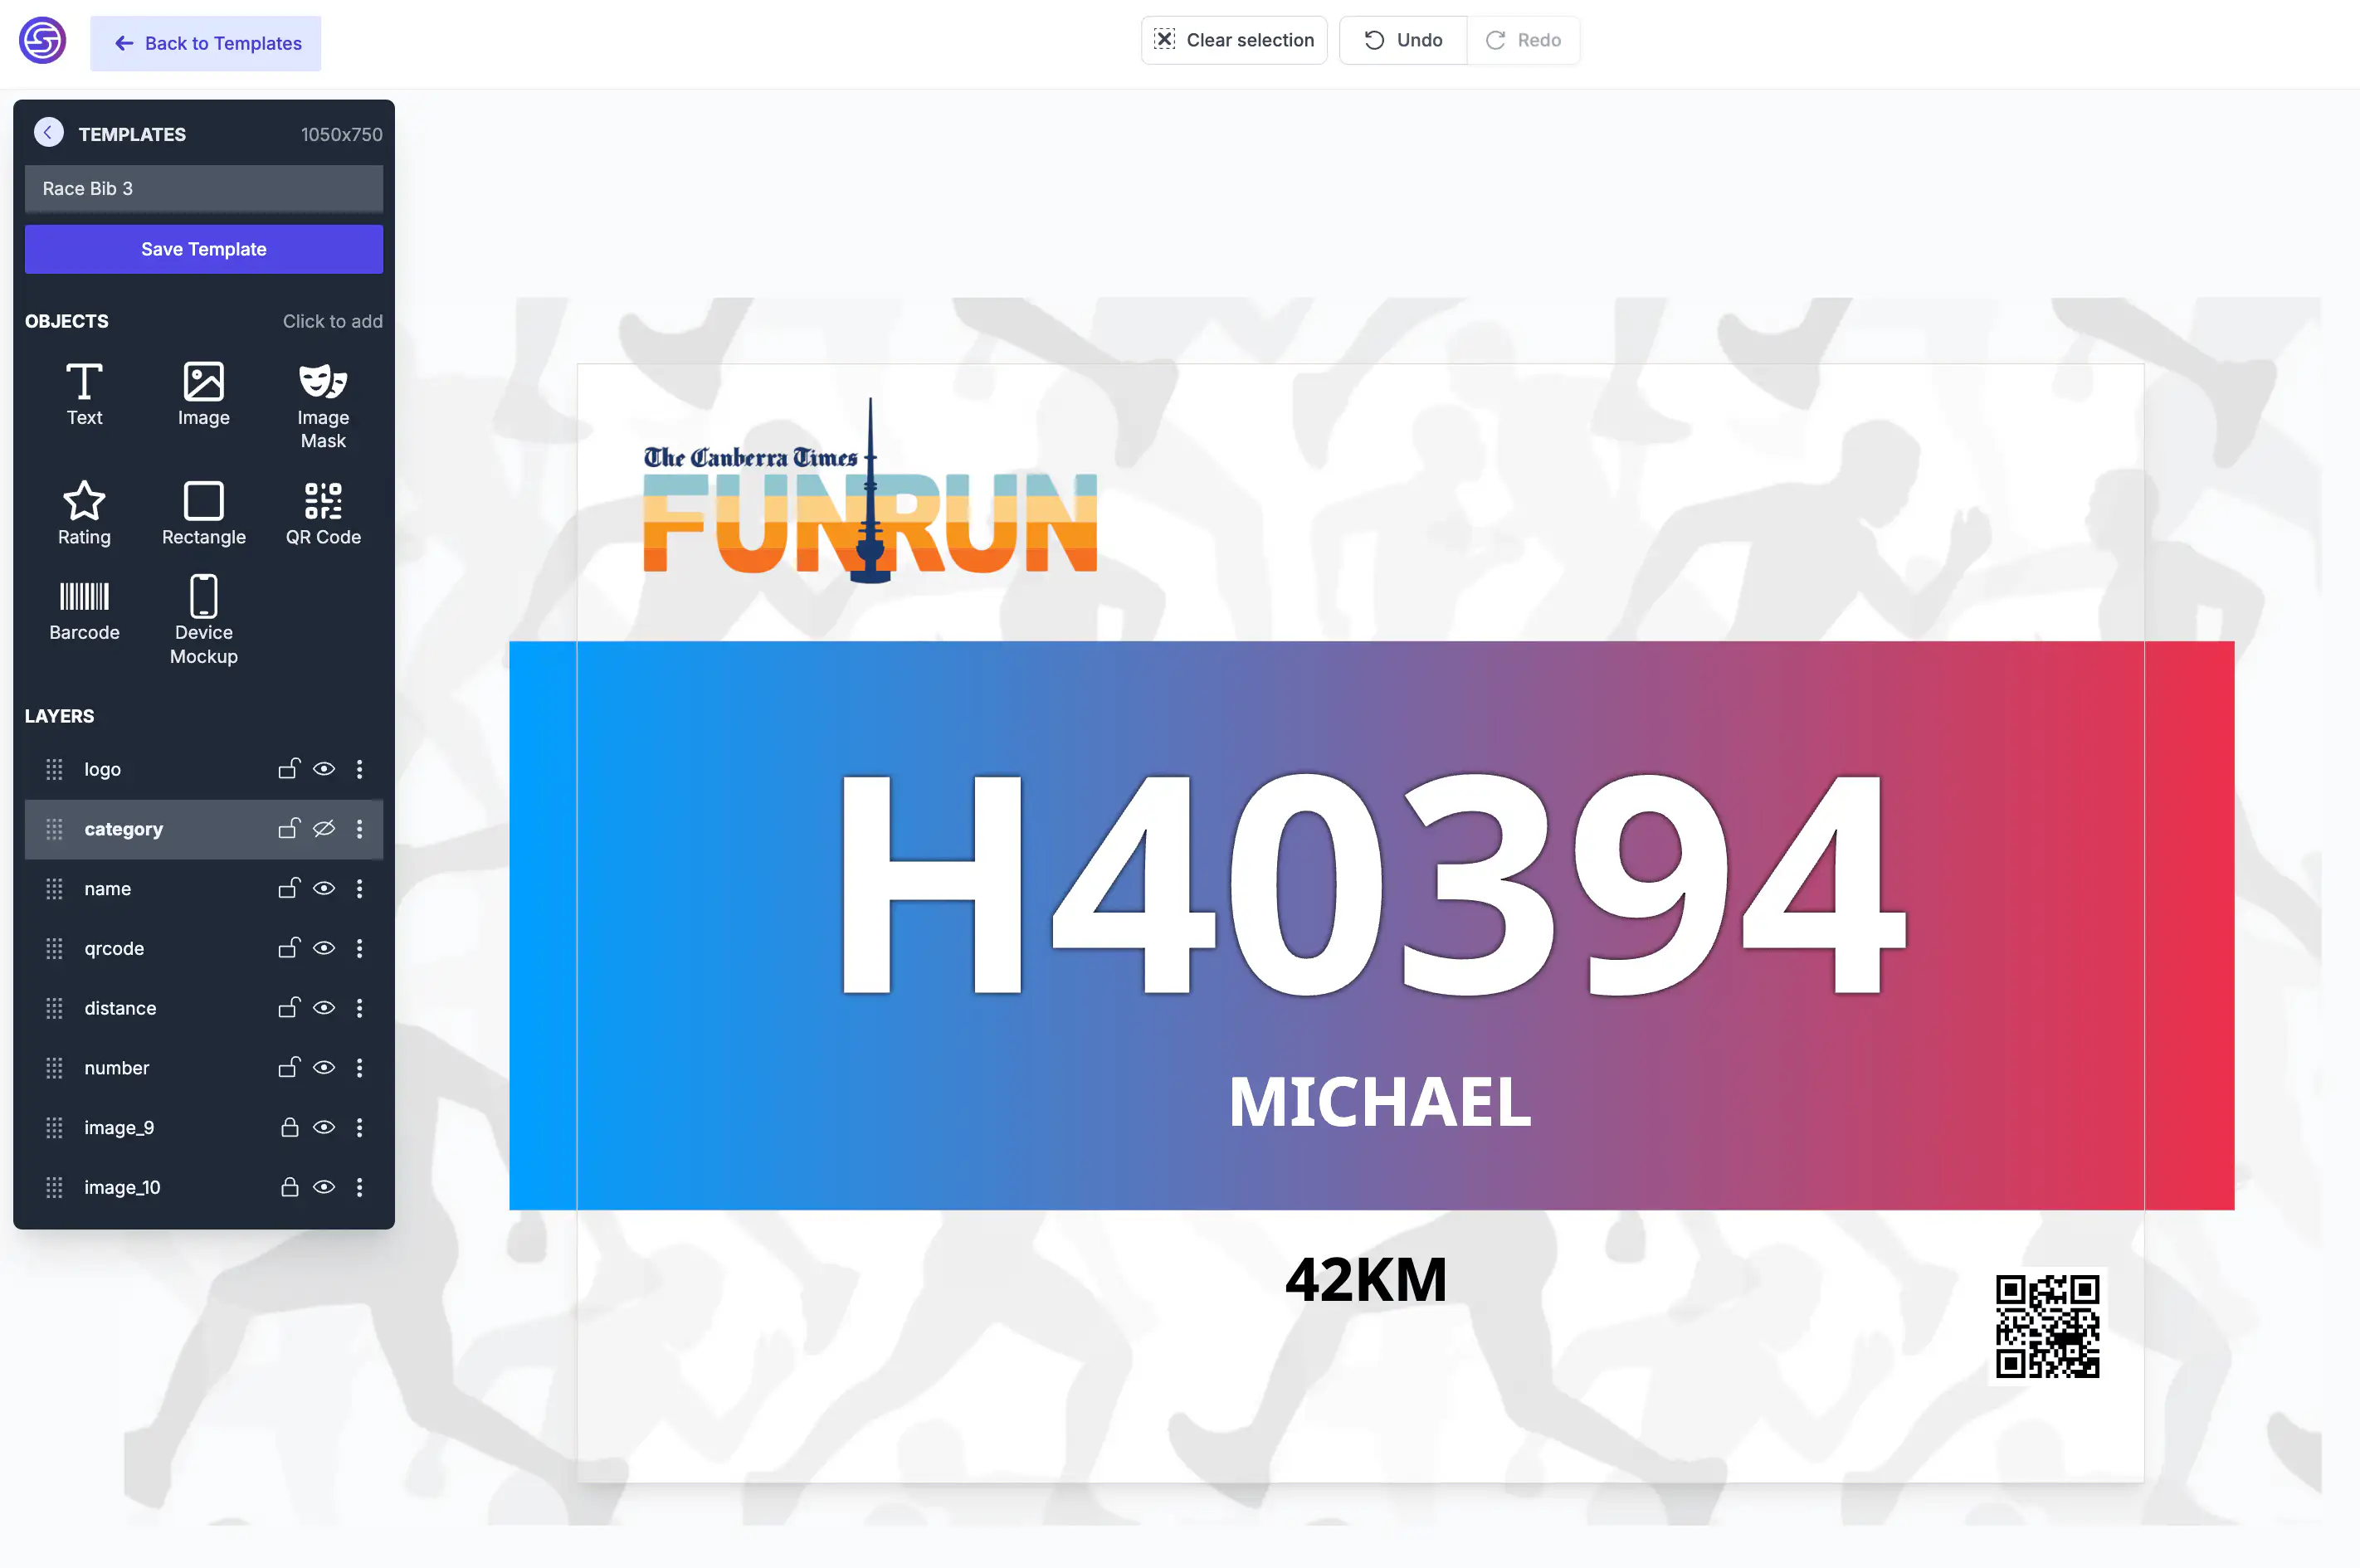
Once Stencil can connect to your Airtable, we will want to map the template layers in Stencil to the right columns in Airtable.
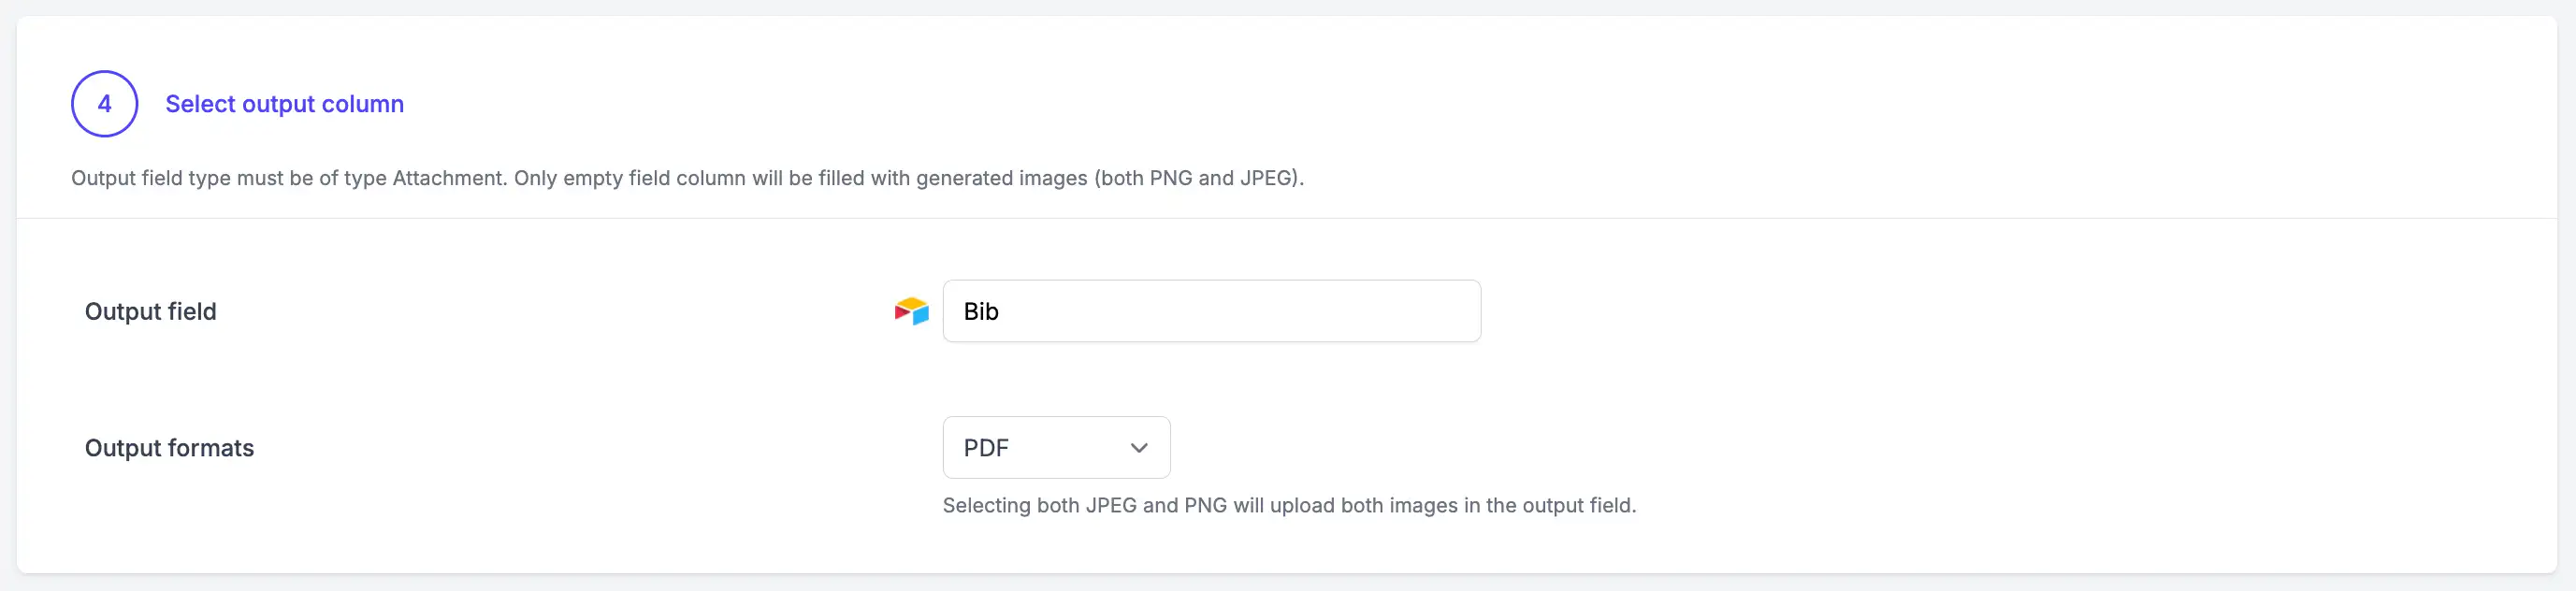
Map your template layers to Airtable columns: connect the number layer with the Bib Number column, qrcode layer to the Link column, name layer to the Name column, and category layer to the Category column.
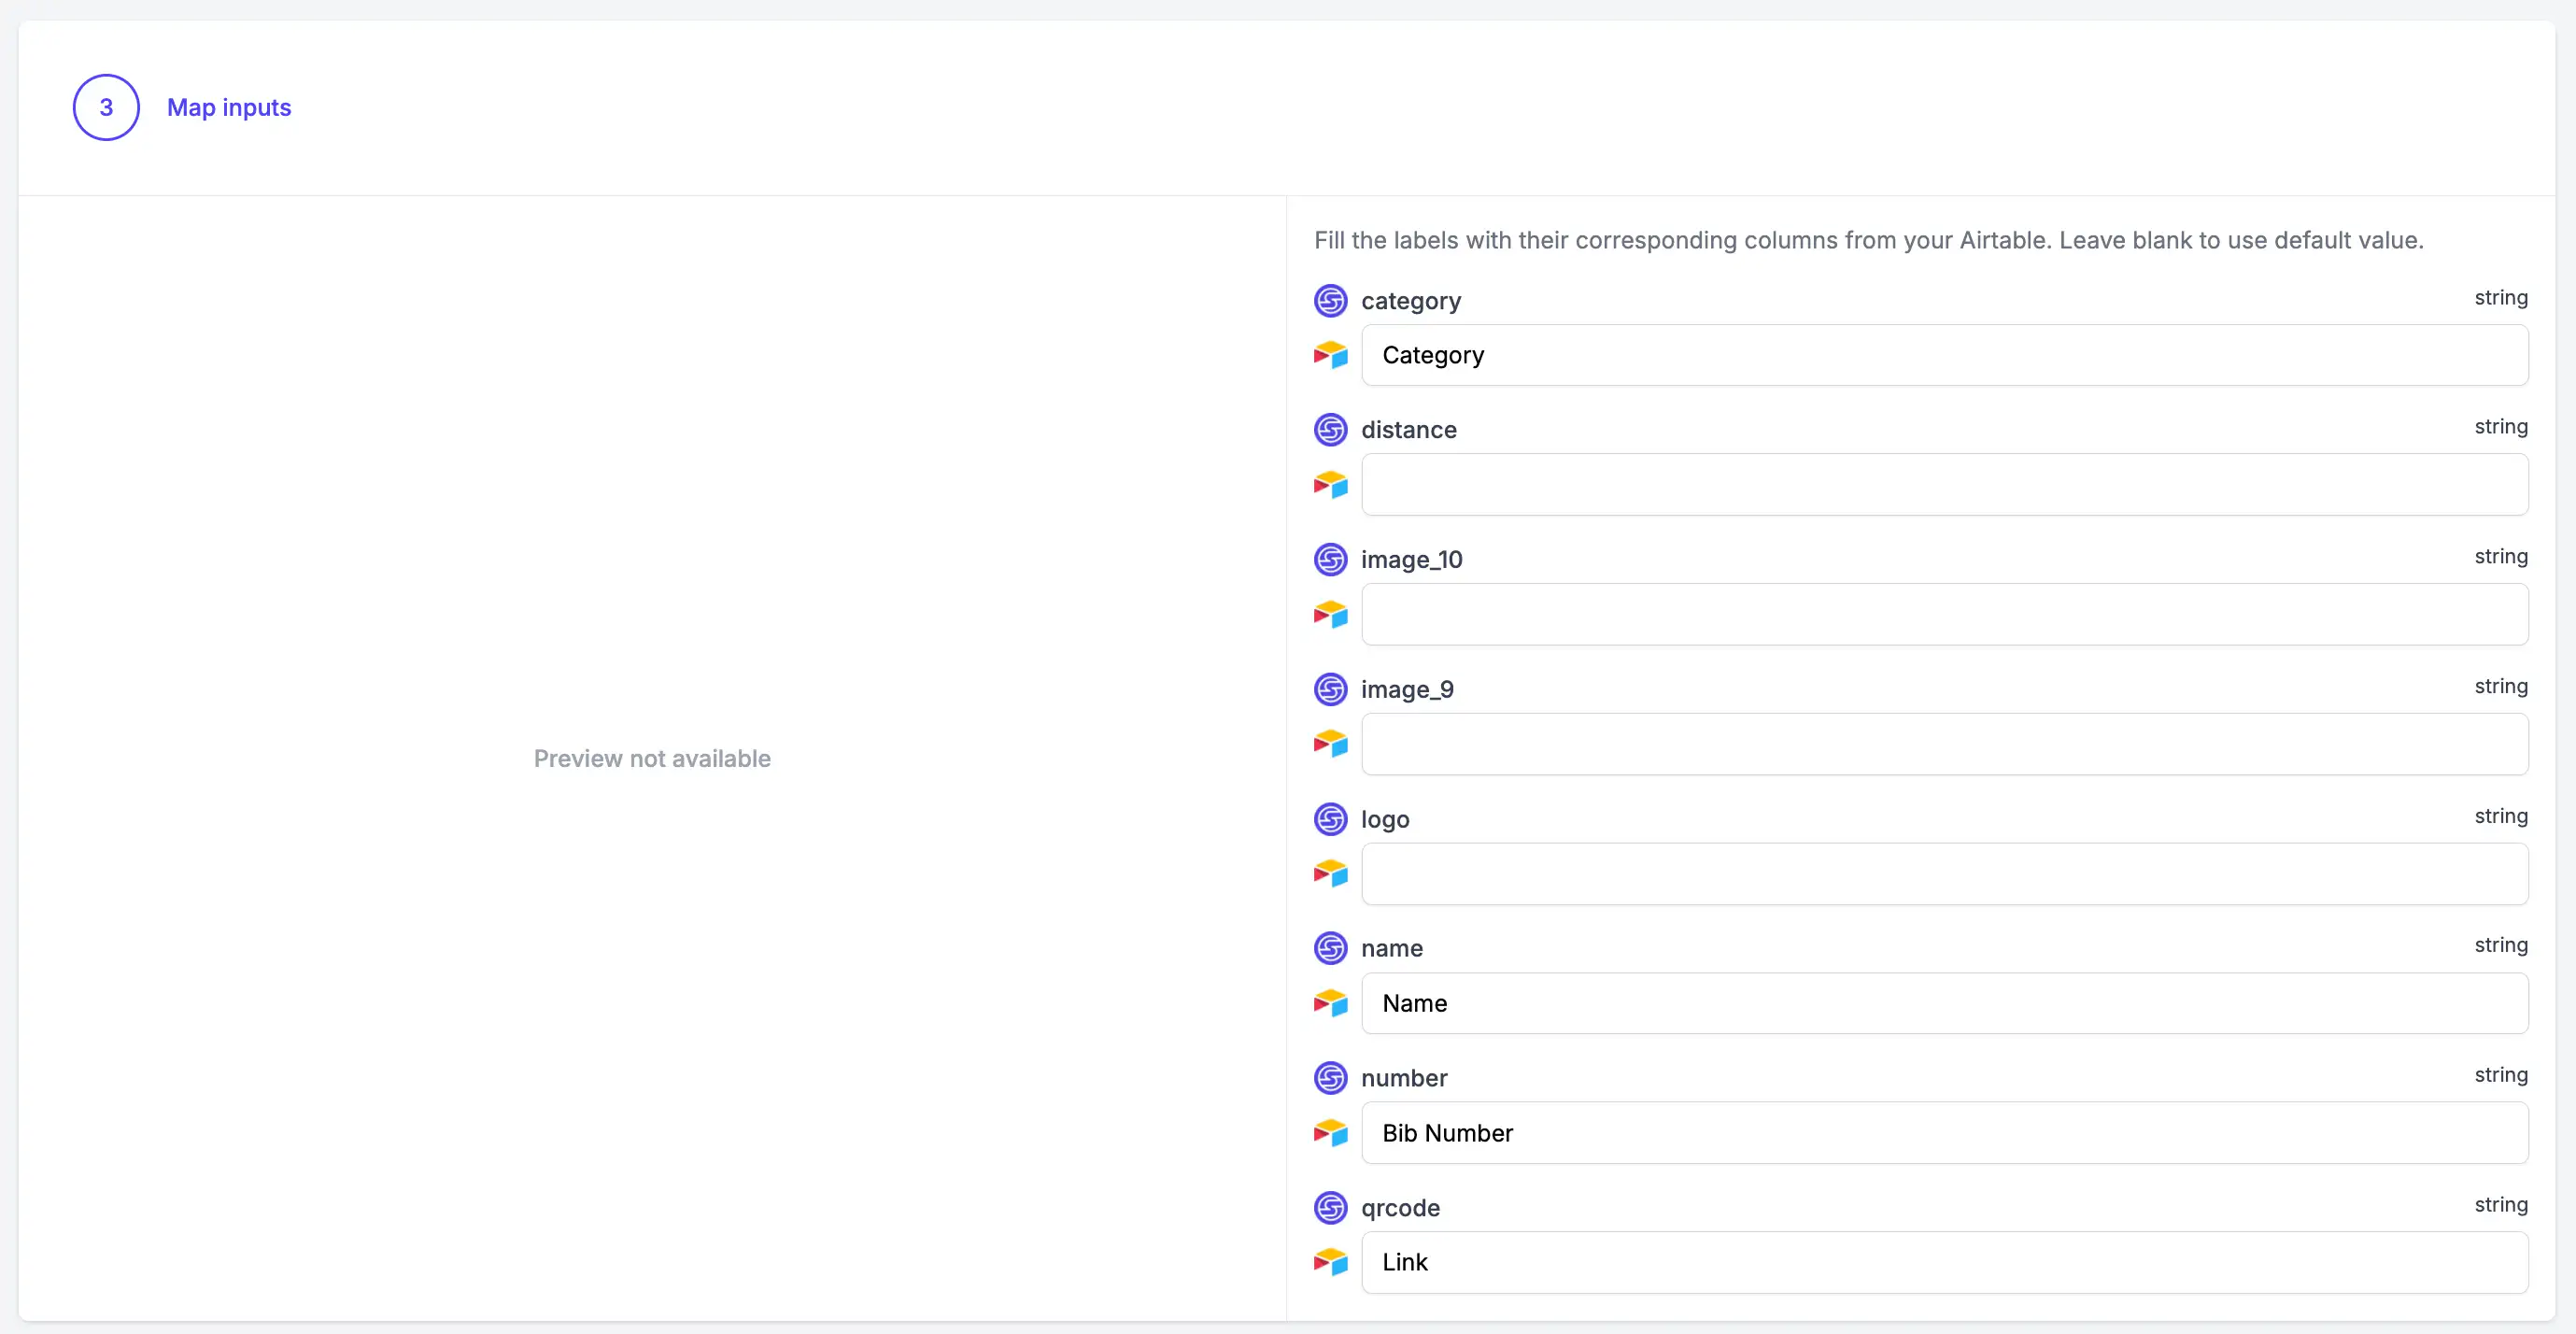
Leave other mappings blank unless they are necessary for customization purposes.
Set the Bib column for storing outputs (the Attachment type). Opt for PDF for printing, or PNG/JPEG for digital images.
Save your integration settings and proceed to generate the bibs!
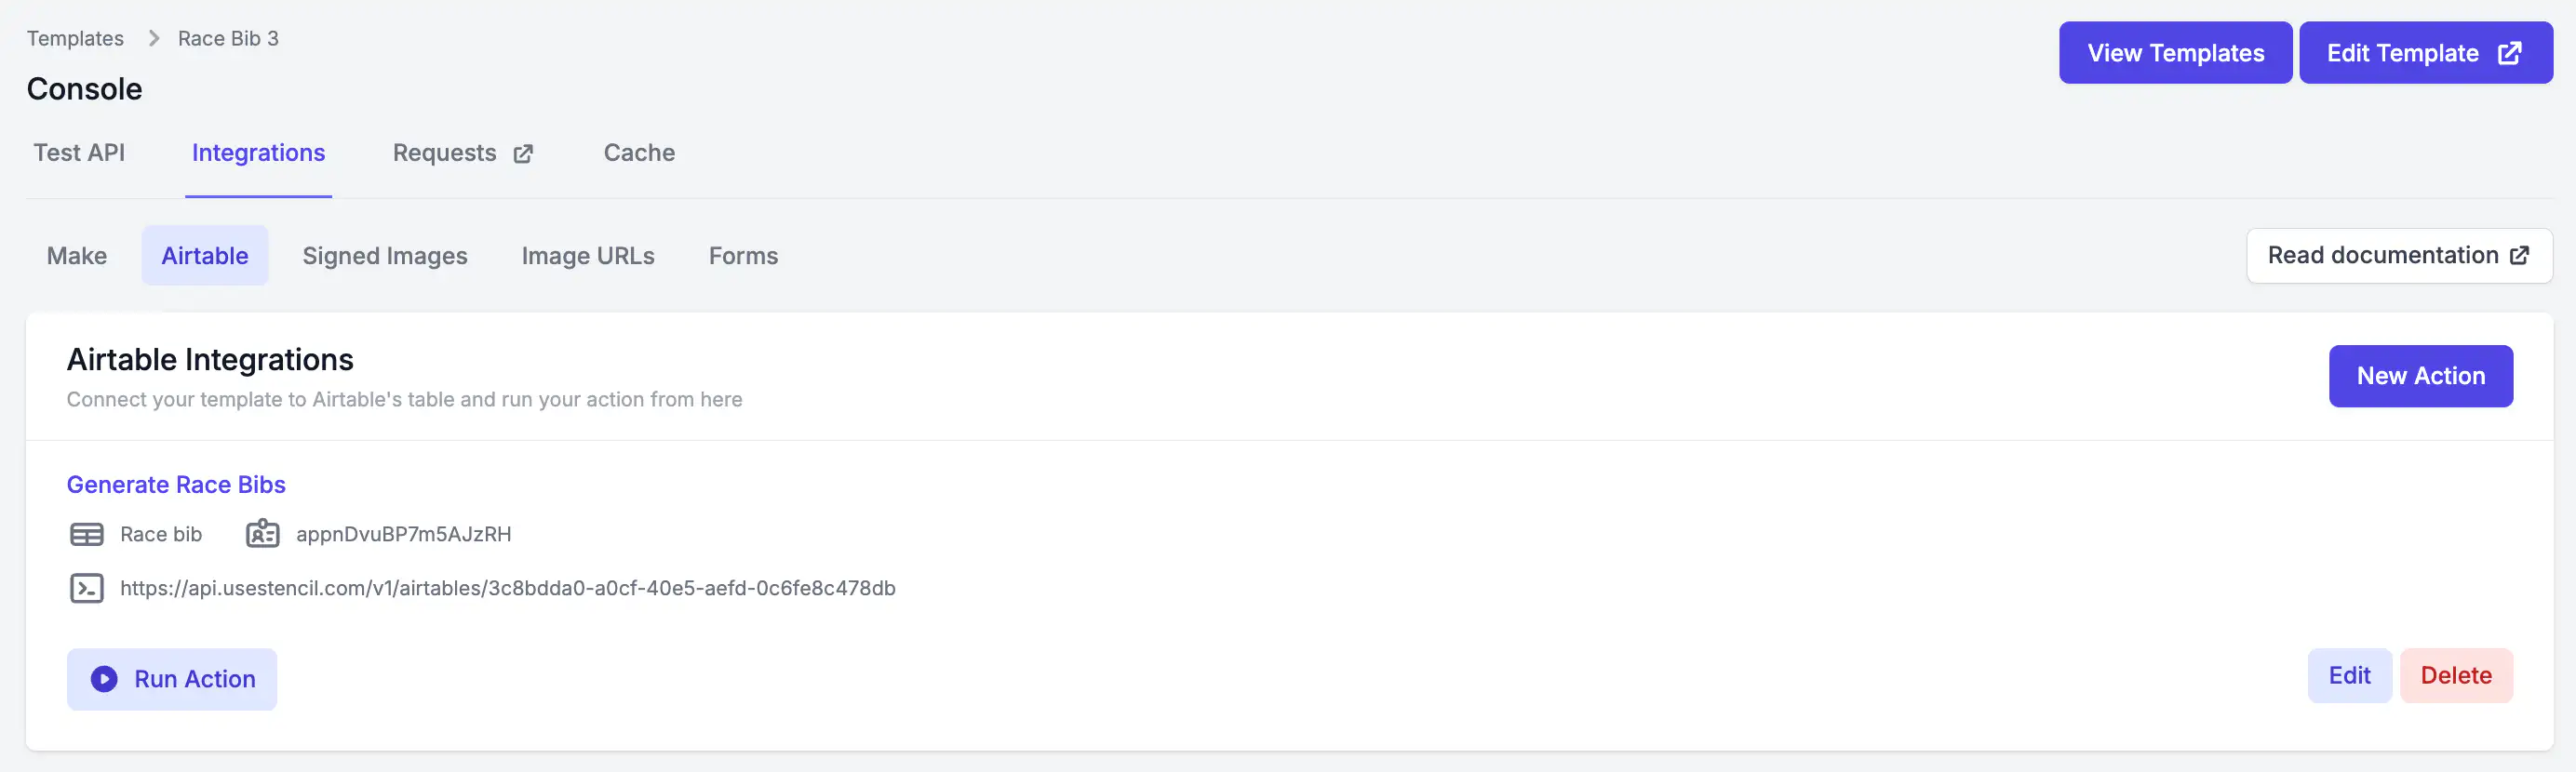
Execute the action to generate the race bibs, with results uploaded automatically as attachments in Airtable. You can smoothly manage this task while handling other activities.
Returning to your Airtable table, you should find the race bibs attached.
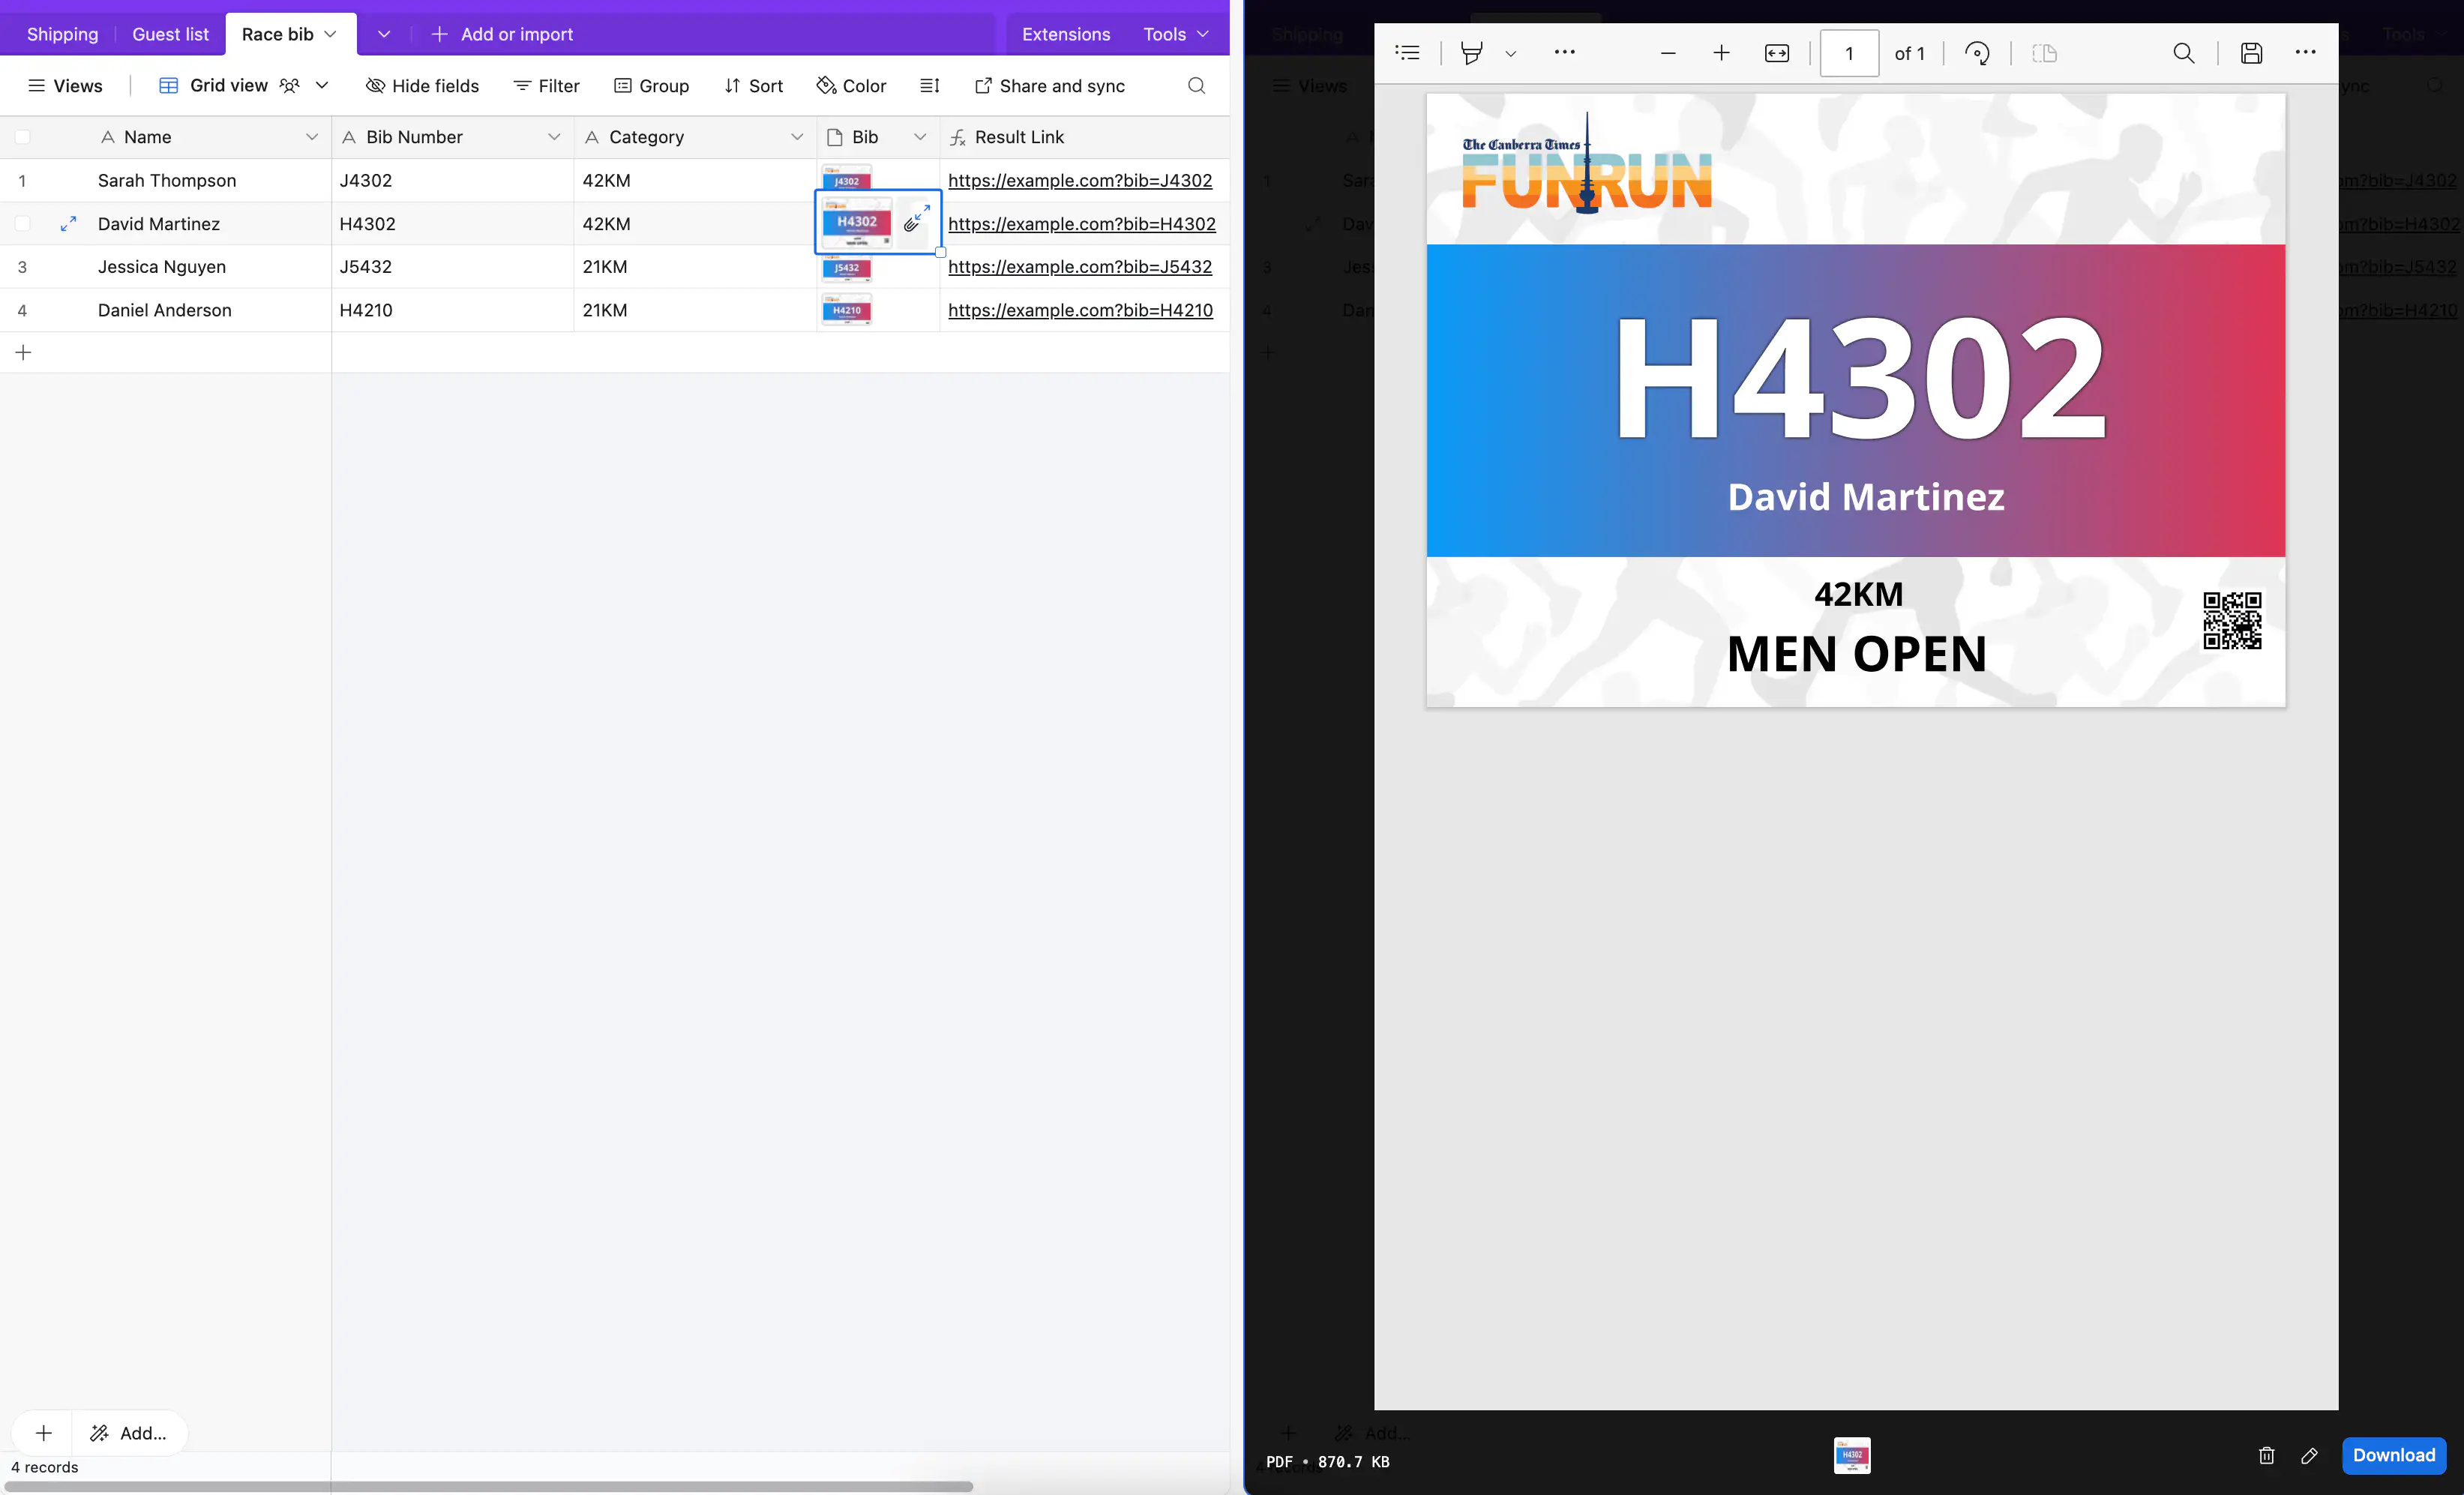
You can now send all the generated bibs to printing services.
For businesses specializing in race bib production, Stencil offers advanced API capabilities to facilitate programmatic image and PDF generation, drastically cutting down on design time. This functionality is particularly advantageous for companies managing large-scale events with substantial production needs.
With Stencil's API, businesses can automate the entire design process, allowing race bibs to be generated consistently and efficiently without manual input.
We also provides various other integrations that cater for different usage, you can try one of the demo here: Race Bib Maker